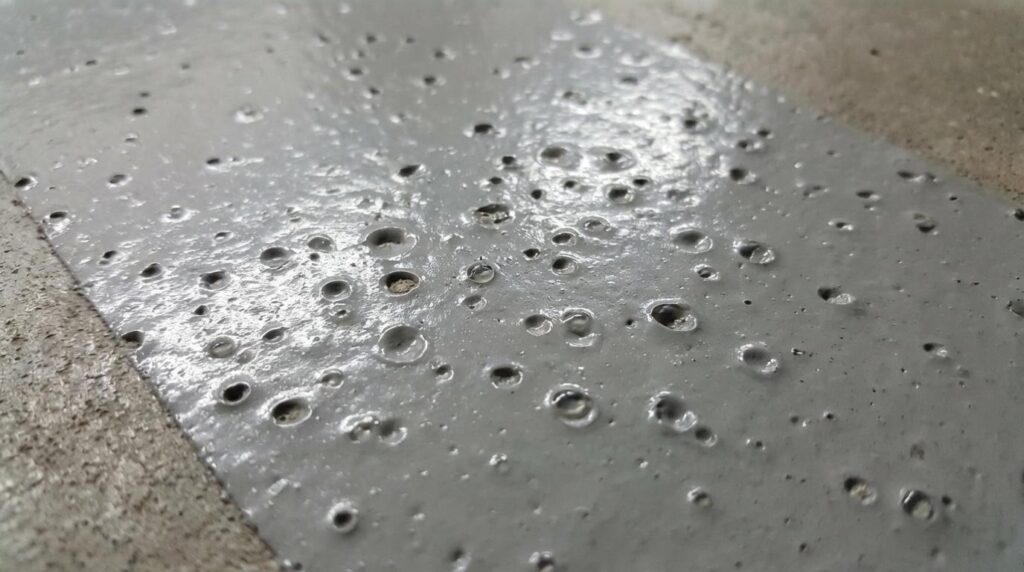
Epoxy floor bubbles form when trapped air or moisture escapes through the coating before it fully cures. The most common causes are inadequate surface preparation, high concrete moisture content, and applying coatings in the wrong temperature or humidity conditions. A1 Concrete Coatings eliminates these issues through commercial-grade prep equipment and moisture testing on every project.
Most homeowners assume the bubbles mean they got a bad batch of epoxy. The coating itself usually isn’t the problem—it’s what’s happening underneath. Concrete is porous, and when moisture or trapped air inside the slab has nowhere to go, it pushes up through the wet epoxy, creating visible blisters that harden in place.
What Causes Bubbles in Epoxy Floor Coatings?
Bubbles in epoxy floor coatings come from three primary sources: outgassing from the concrete slab, moisture vapor transmission, and improper mixing or application.
Outgassing
Outgassing happens when air trapped in concrete’s pores expands and rises through the wet coating. Concrete is naturally porous. A typical garage slab contains thousands of tiny air pockets. When epoxy seals the surface, that air needs to escape. If the coating skins over before the air pushes through, bubbles form and harden in place.
Moisture Vapor Transmission
Concrete slabs without proper vapor barriers allow ground moisture to migrate upward continuously. When epoxy blocks that moisture path, water vapor collects beneath the coating and pushes it away from the slab.
Improper Mixing
Over-mixing the epoxy resin and hardener whips air into the material itself, creating micro-bubbles throughout the coating that no amount of surface prep can fix.
How Concrete Moisture and Temperature Create Outgassing
Illinois basements and garages are particularly prone to moisture-driven bubbles.
Our Region’s Clay-Heavy Soil
The region’s clay-heavy soil retains water, and many older homes in Arlington Heights, Des Plaines, and Elk Grove Village lack modern vapor barriers beneath their slabs.
Temperature and Moisture
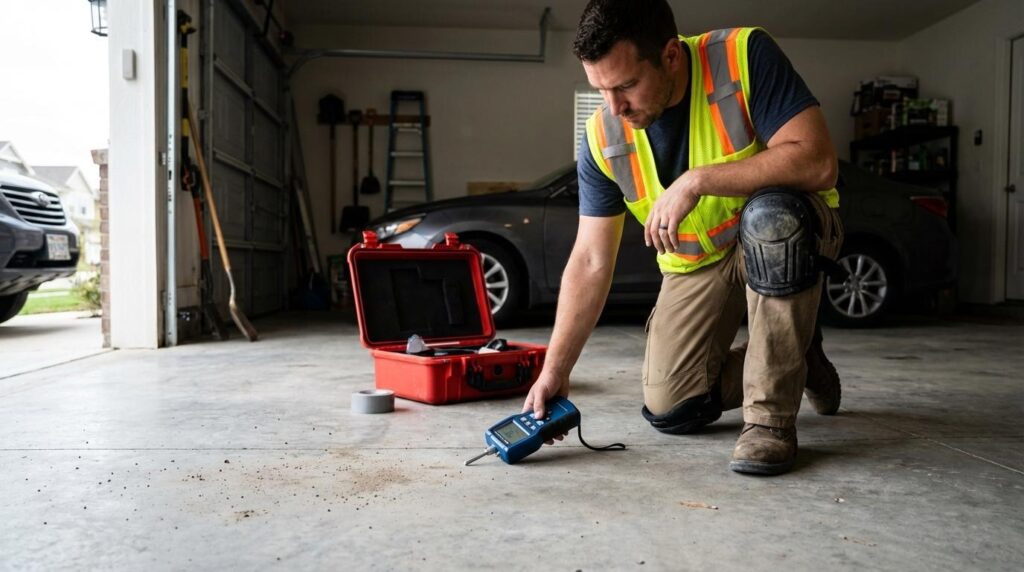
Applying epoxy when concrete is warming up, such as a spring morning that heats through the afternoon, causes air in the slab to expand and push outward just as the coating begins to cure. Professional installers test concrete moisture levels before starting any project. Industry standards call for moisture vapor emission rates below 3 lbs per 1,000 square feet over 24 hours. Readings above that threshold mean the slab needs a moisture mitigation primer before any coating goes down.
Excess Humidity
When ambient humidity exceeds 85%, epoxy cures unevenly and traps condensation between layers. This is why summer installations in Northern Illinois require climate monitoring throughout the application window.
How Professionals Prevent Epoxy Bubbles
Professional installers use a combination of advanced equipment, specialized materials, and precise timing to ensure a bubble-free finish that DIY kits can’t achieve.
Professional-Grade Surface Preparation
A1 Concrete Coatings uses commercial walk-behind diamond grinders to open the concrete’s pore structure and create a mechanical bond profile. This step removes the sealed surface layer that traps air, giving outgassing a path to complete before coating application. See our full installation process for a step-by-step breakdown.
HEPA-Filtered Vacuum Systems
Specialized vacuums remove all grinding dust and debris. Any dust left on the surface creates weak points where bubbles and delamination start.
Proper Primer Application
A polyaspartic primer penetrates concrete pores and seals moisture pathways before the decorative coat goes on. This is a step most DIY epoxy kits skip entirely.
Temperature and Timing Control
Professional installers schedule the application when concrete and ambient temperatures are stable. For polyurea and polyaspartic systems, temperature restrictions are minimal because the fast-cure chemistry hardens before outgassing can create visible bubbles. That’s one reason polyaspartic coatings produce smoother results than slower-curing epoxy in real-world garage conditions.
Frequently Asked Questions
Can you fix bubbles in an already-cured epoxy floor?
Small isolated bubbles can be sanded down and recoated, but widespread bubbling usually requires grinding off the failed coating and starting fresh. The underlying moisture or prep issue must be resolved first, or the new coating is likely to bubble again. A1 Concrete Coatings offers free assessments for floors with existing coating failures.
Do polyurea coatings get bubbles like epoxy does?
Polyurea and polyaspartic coatings are significantly less prone to bubbling because they cure in hours rather than days. The fast cure window closes before trapped air or moisture can push through the surface. Professional surface preparation with diamond grinding further reduces the risk.
Why did my DIY epoxy garage floor kit bubble?
Most DIY kits include acid-etch preparation instead of diamond grinding, which doesn’t open concrete pores enough to release trapped air. With no moisture testing and no primer coat, retail kits leave all three major causes of bubbles unaddressed. Professional installation eliminates these gaps and prevents bubbles from appearing on coated garage floors.
Skip the Guesswork on Your Garage Floor
Epoxy bubbles aren’t random. They follow predictable patterns tied to moisture, temperature, and surface preparation. Every one of those variables can be controlled with the right equipment and testing protocols.
If you’re dealing with a bubbled floor or planning a new coating, professional installation using commercial-grade materials and proper moisture testing can prevent the problem entirely. Contact A1 Concrete Coatings for a free estimate and learn how our process eliminates these common failures.

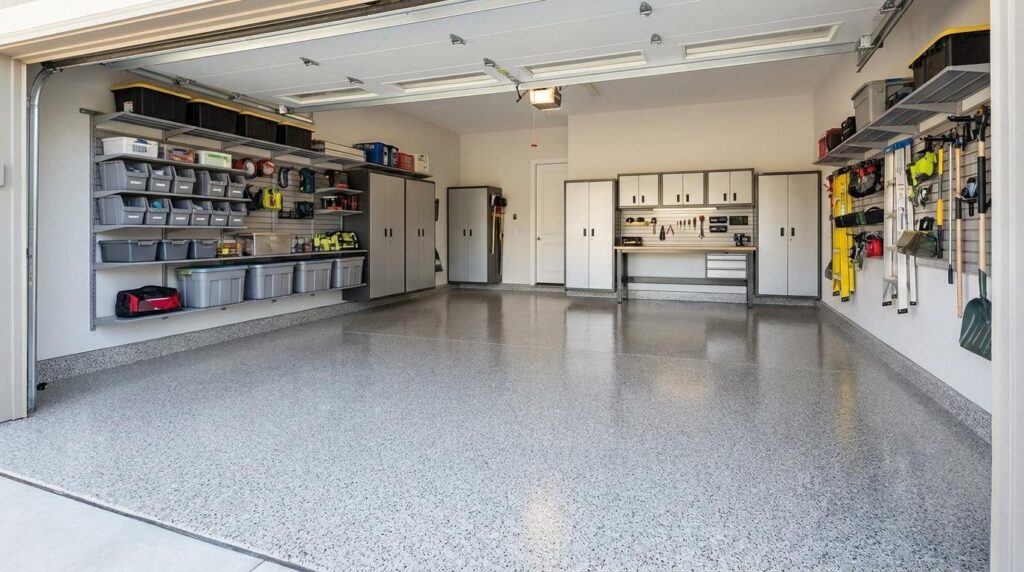
Under the direction of founder Luis Contreras, A1 Concrete Coatings provides various types of concrete coatings, including flake floors, solid concrete dyes, polished concrete floors, metallic epoxy floors, quartz epoxy floors, and urethane cement-coated floors. Louis and Angie Contreras built A1 Concrete Coatings from the ground up. Louis runs every job: handling estimates, leading installs, and ensuring each floor meets the standards the company was built on.