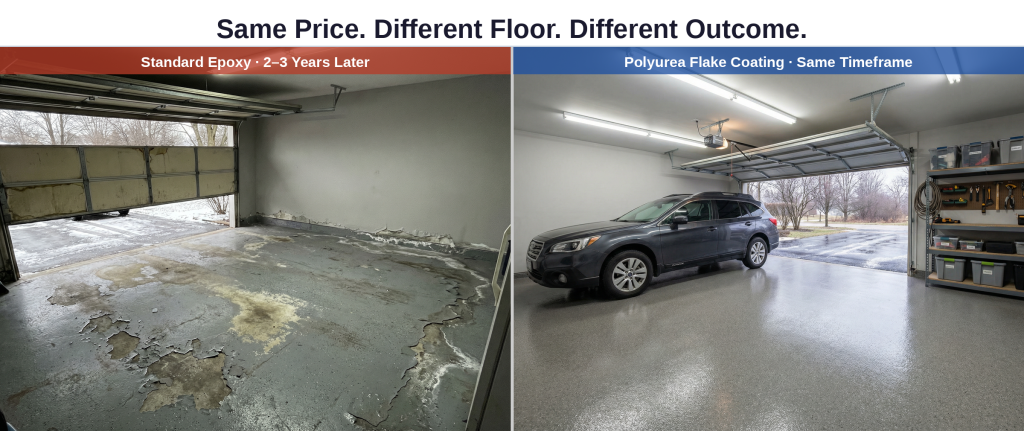
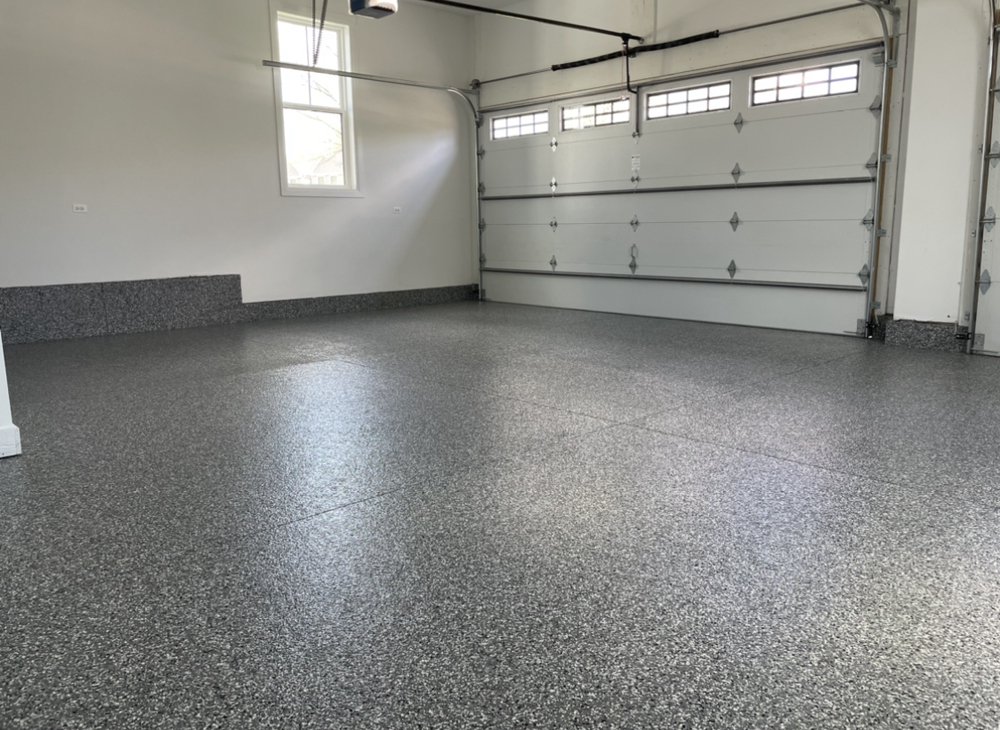
Two homeowners in Schaumburg get identical quotes: $3 per square foot each but end up with completely different floors five years later. One still looks sharp. The other is peeling. The price was the same, but the coating wasn’t. 

That gap is the real story behind garage floor pricing in the Chicago suburbs, and it’s the one most cost guides skip. As an installer of professional-grade garage floor coatings for homeowners across Chicagoland, A1 Concrete Coatings breaks down what actually drives cost, quality, and longevity in this market.


What Actually Drives the Cost of a Garage Floor Coating?

Most homeowners assume square footage is the primary cost driver. It matters, but it’s rarely the most important variable. The bigger factors are coating type, surface preparation requirements, and material grade.

For a standard two-car garage (roughly 400-500 square feet), professional garage floor coating services in the Chicagoland area typically start around $1,500, with full polyurea/polyaspartic systems running significantly higher depending on prep and garage size. 

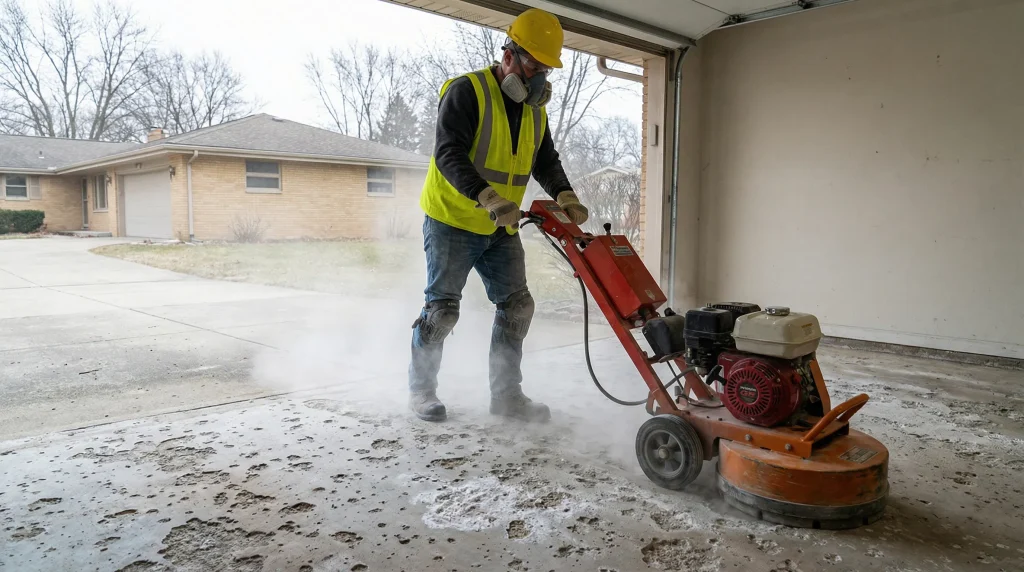
Surface prep is where hidden costs live. Concrete that has active oil stains, moisture intrusion, or visible spalling (flaking and pitting from freeze-thaw damage) needs mechanical grinding before any coating is applied. Skipping prep is the reason DIY kits and cut-rate installations fail: the coating bonds to a weak surface layer instead of the concrete itself, and delamination often begins within the first couple of seasons.


Why Chicagoland Garages Require More Prep Than Most

Northern Illinois experiences frequent freeze-thaw cycles per winter. Each cycle forces water into the microscopic pores of uncoated concrete, where it expands as it freezes and contracts as it thaws. Over several seasons, this process breaks down the surface layer, creating the pitted, chalky texture common in older Chicagoland garages.

Road salt accelerates the damage. Garages in Des Plaines, Buffalo Grove, and the North Shore suburbs see heavy deicing chemical exposure tracked in from driveways every winter. Chloride compounds penetrate concrete and attack any coating system that wasn’t applied to a properly prepped, clean surface.

This is why professional installers in this market typically diamond-grind the floor before coating rather than using an acid etch. Grinding removes the compromised surface layer and opens the concrete’s pores for a true mechanical bond—one that holds when temperatures swing from sub-zero to 70 degrees in the same week.


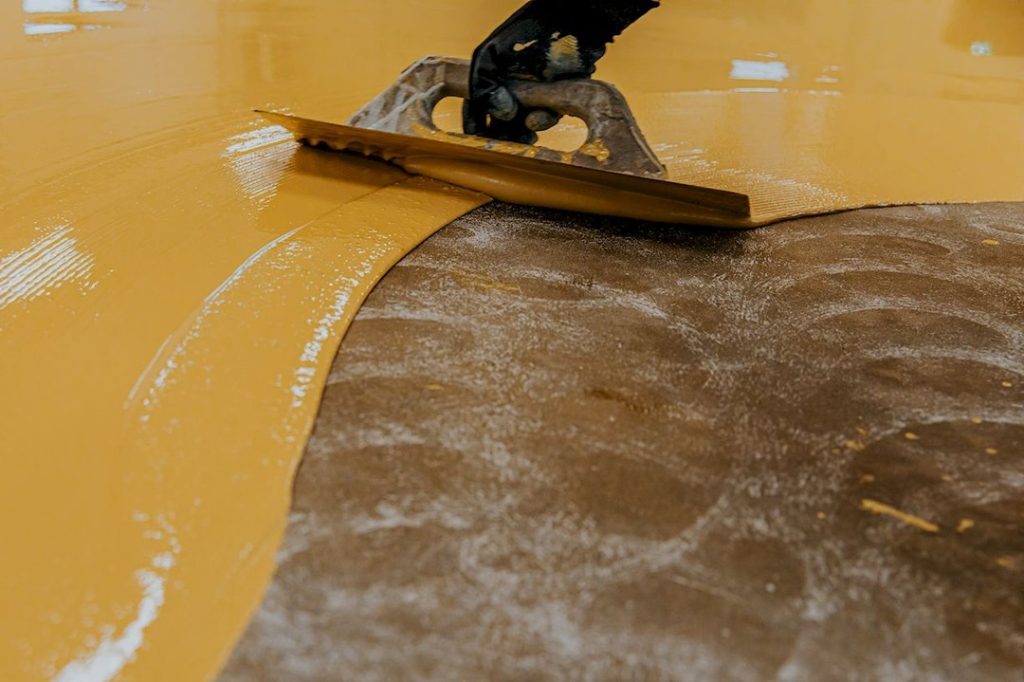
Polyurea vs. Epoxy: What You Get With Each Product

When homeowners search epoxy garage floor cost, they often end up comparing two very different products priced similarly on paper. Understanding the distinction matters because it directly affects how long the floor lasts and how it performs under Midwest conditions.

Standard epoxy is a rigid, two-part system. It’s less expensive to install but is vulnerable to thermal shock. The rapid temperature swings common in an attached Northern Illinois garage can cause it to crack or delaminate over time. It also takes 24-72 hours to cure, which means the garage is out of commission for days.

Polyurea and polyaspartic systems are more flexible, cure in 3-4 hours, and resist UV yellowing, which matters if your garage door faces south or west and gets direct afternoon sun.

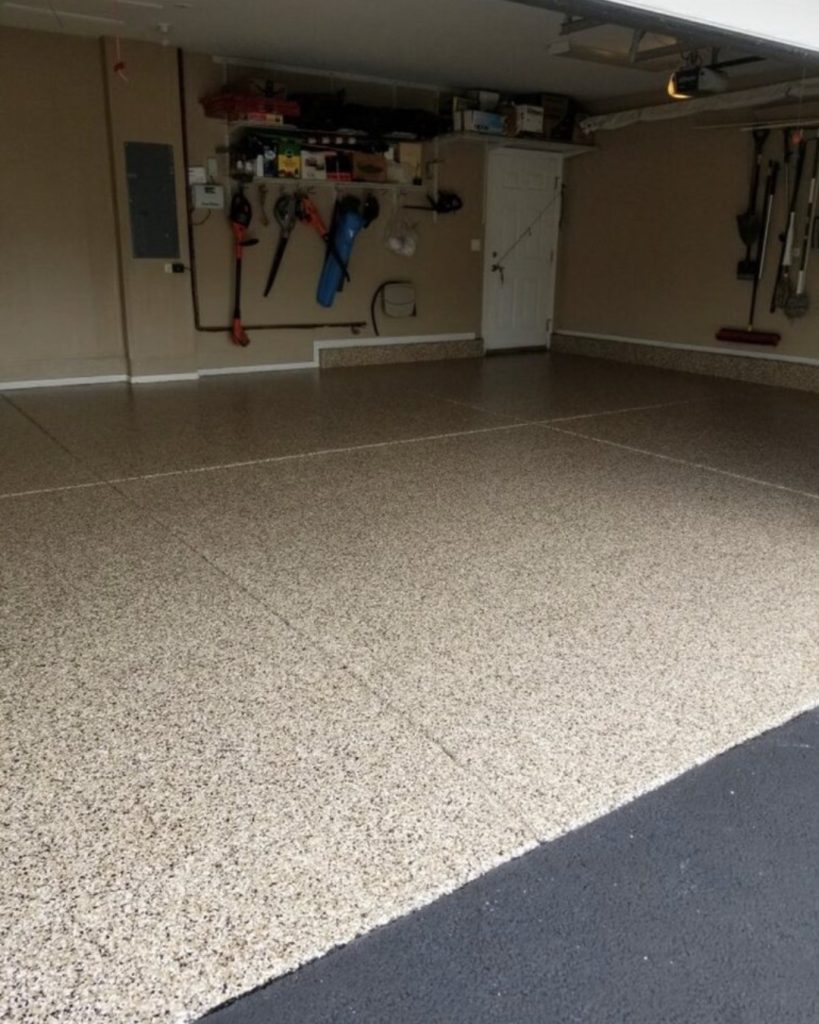
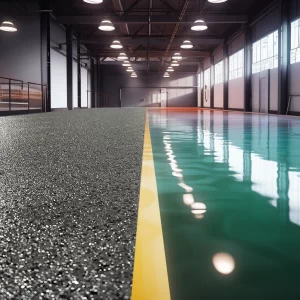
If aesthetics are the priority, metallic epoxy floors are a distinct category. They’re a high-gloss decorative solution popular in showrooms, retail spaces, and residential garages where the floor is part of the design. For daily-driver garages that see cars, salt, and weather, 1-day polyurea and polyaspartic flake flooring is typically the more durable and practical choice.


Coating System Typical Cost (Two-Car Garage) Cure Time Best For
Basic single-layer epoxy $1,500–$2,500 24–72 hours Low-traffic spaces
Mid-grade epoxy system $2,500–$3,500 24–72 hours Light residential use
Full polyurea / polyaspartic flake $3,500–$6,500 3–4 hours (1 day) Daily-use Chicagoland garages

What To Expect From a Professional Quote in 2026

A legitimate garage floor coating quote should itemize surface preparation, material type, number of coats, and any crack or joint repair included. If a quote doesn’t specify the coating system by name (polyurea, polyaspartic, or epoxy), ask. The price gap between systems exists for a reason.

Before comparing quotes, read up on the differences between polyurea and epoxy floor coatings. The lowest quote is rarely the safest choice in a climate where temperature extremes stress every coating system annually. A floor that needs recoating in three years costs more over a decade than one installed correctly the first time.


A Smarter Way To Compare Cost

When reviewing quotes, look beyond the square-foot price and focus on what you’re actually paying for: preparation quality, material type, and long-term performance. In Chicagoland’s freeze-thaw climate, those factors matter more than upfront cost alone.

A1 Concrete Coatings offers free estimates for homeowners across Chicagoland. A professional assessment tells you exactly what prep your floor needs and which coating system fits your space and budget. Call (847) 412-8951 or send us a message to schedule yours.

If you’re looking to protect and spruce up the concrete in your home or place of business, you have a few options: Epoxy coatings and polyurea coatings. Both offer unique benefits, but it’s important to understand which option is right for you.

Epoxy floor coatings are a two-part system consisting of an epoxy resin and a hardener. Once applied, they create a thick coating that’s nearly impervious to scratches, staining, and chemicals. They are great for heavy-duty areas such as garages, workshops, warehouses, and commercial spaces that experience high levels of foot traffic.

Polyurea coatings are also two-part systems consisting of a polyurea resin and a catalyst for curing. Once the coating is applied, it hardens within minutes into a thick, durable surface that’s also resistant to scratches, staining, and chemicals. Polyurea coatings are great for areas such as bathrooms, kitchens, entryways, basements and pool decks where an attractive finish is desired in addition to durability.

Polyurea floor coating adheres to the substrate and expands to strengthen vulnerable spots. When compared to epoxy flooring, polyurea floor coating offers:

  • More flexible. flooring material
  • UV stable, so it doesn’t fade
  • Scratch resistant
  • Slip-resistant
  • Designed to endure the most unforgiving conditions

Acrylic coatings are one-component systems that dry to a tough and resilient finish. They are easy to apply and provide excellent protection against scratches, staining, and chemicals. Acrylic coatings are great for residential spaces such as living rooms, bedrooms, patios and porches that need a waterproof coating that still looks attractive.

By choosing the right coating for your project, you can ensure that your concrete surfaces look great and last a long time. Our team at A1 Concrete Coating has years of experience in providing quality services to our customers, so contact us today to get started!

If you’re looking to protect and spruce up the concrete in your home or business, Polyurea and polyaspartic concrete coatings are the best option.

Used together these materials offer unique benefits. Polyurea & Polyaspartic floor coatings are selected because they  are durable, chemical and stain resistant. Therefore they are often used in used in high traffic areas for both residential and commercial applications.  Polyurea & Polyaspartic floor coatings can withstand stable heat up to 265℉. This material is UV resistant and will not tint or discolor due exposure of sun light.

This makes Polyurea an excellent choice for any concrete floor! The applications for polyurea & epoxy floor coatings are endless.   However, below are some spaces which often utilize concrete Polyurea & Polyaspartic coatings:

• Basement Floors • Medical Buildings & Facility Floors
• Commercial Floors • Office Building Floors
• Driveways & Walkways • Patio & Pool Deck Surfaces
• Garage Floors • Police Department Floors
• Government Building Floors • Restaurants and Bar Floors
• Gun Range Floors • Schools & Classroom Floors
• Industrial Floors • Showroom Floors
• Kitchen Floors • Warehouse Floors


Polyurea coatings are also two-part systems consisting of a polyurea resin and a catalyst for curing. Once the coating is applied, it hardens within minutes into a thick, durable surface that’s also resistant to scratches, staining, and chemicals.

Polyurea coatings are great for both interior and exterior concrete surface areas such as bathrooms, kitchens, entryways, basements, garage floors, concrete driveway surfaces and pool decks where in addition to durability, an attractive finish is often desired. By choosing the right coating for your project, you can ensure that your concrete surfaces look great and last a long time.

Our team at A1 Concrete Coating has years of experience in providing quality services to our customers, so contact us today to get started!

Installation Process for Polyurea & Polyaspartic Flake Floor CoatingsThis article provides the step-by-step process for installing polyurea & polyaspartic flake floor coatings.  However, please be warned that you should not try this at home, unless you are a professional and have the proper equipment that is required to adequately prepare the existing concrete surface.

Please note, depending upon which Polyurea & Polyaspartic flake flooring system you select, this process may vary. Be sure to refer to your manufacturers sequence of operations provided on the specific material that you have purchased.

Before getting into the details of the actual installation process, please note some of the following tools which are required.

A) Personal Protection Equipment (PPE) for protecting your eyes, skin and lungs from concrete dust and fines produced from grinding. It is important to protect workers from any airborne debris and chemicals. B) Commercial Walk-Behind  Concrete Grinder outfitted with HEPA Vacuum collection System C) Hand-held Angle Grinder D) Stand-Alone Commercial HEPA Vacuum collection System E) Spiked Shoes for Floor Coating Installation.

Step 1: Grind and prepare the existing concrete surface.

Think of your floor as building structure, if your foundation is cracked, damaged or weak, then so will be the structure that you build upon it. As with any coating or topping, surface preparation is an important first step.  Therefore, you must grind the existing concrete surface using commercial concrete grinding equipment.  It will also be required to use a hand-held angle grinder to prepare edges and other area which your large walk-behind grinder could not address.  In total, grinding is performed not only to assist with cleaning the existing concrete surface, the scarification of the surface also produces a someone rough grooved surface that is conducive to accepting the polyaspartic base coat material which will later be applied.

Step 2: Identify and repair any surface defects.

After grinding the existing concrete surface,  you must identify and repair any surface defects.  we repair these cracks by routing them with a grinder. This opens up the crack to allow for placing patching materials. These routed cracks are filled with a fast curing crack filling compound.  Once this crack filler has had time to dry, we then grind it once more to ensure a smooth scarified surface.

Step 3: Clean / Vacuum the concrete surface.

Even if you are a professional concrete coating contractor who has concrete grinders outfitted with a HEPA vacuum, grinding the existing concrete surface will still result in lots of dust and debris. This additional dust must be completely cleaned and collected in order to provide a surface that is ready for prime coating.  As a professional concrete coating company, we follow the initial concrete grinding operation, (after patching defects) with a second vacuum process using yet another commercial grade HEPA vacuum. Once all of the repairs are complete and the floor is vacuumed to collect any remaining dust, it is time to thoroughly prime the existing concrete.

Step 4: Priming the prepared concrete surface.

Before priming can begin, your primer must be mixed.  Whether you are using concrete coating materials produced by SurfKoat Coatings, Inc. or concrete coating systems by Sherwin -Williams, both require mixing of your prime coat material. Be sure to follow the specific instructions for mixing your prime coat material which are provided by your specific manufacturer.  Once your prime coat material is prepared, it is now time to apply the first coat of polyaspartic primer material to your fully prepared concrete surface. This prime coat provides a strong bond between your concrete surface and our products while providing an extra layer of protection against moisture damage. This material should be generously applied using a paint roller with an extension that allows you to walk and roll the material into place.

Step 5: Apply Flake Materials

While the prime coat material is still wet, you must quickly apply the flake flooring material. This material is manually placed against walls and trim, and is sprinkled generously upon the floor.  This is where you Spiked Shoes come in handy, as you will be required to walk upon the freshly prime coated floor. The spiked shoes for floor coating installations release air bubbles from the overlays, while protecting these materials from footprints.

Step 6:  Drying Period

Now that the prime coat and flake material have been placed, you must wait 2-3 hours for this layer to cure.

Step 7: Scrape Flakes to Produce a flat surface which is ready for the Polyurea Top-Coat

Once the 2-3 hours have passed you can then begin scraping or brushing the flake materials to remove any raised portions of the flakes.  This is done with a broom, floor scraper, or wire brush in order to create a flat and level surface for the top coat material. After this step has been completed your floor should be ready for whatever type of Polyurea finish you are wanting to apply!

Step 8: Apply the Final Coat of High Gloss Polyurethane  

The final step is to apply the top coat of Polyurethane finish. This should be applied in one or two even coats using a roller and/or brush. Again, your Spiked Shoes will come in handy as you will be required to walk upon freshly placed polyurethane material.  Once this step has been completed you must wait atleast 12 ours before walking upon your new Polyaspartic Flake Floor.  You can then enjoy the beauty of your brand new concrete coated floor.

In summary: most polyurea coated floor are two-part systems consisting of a polyurea resin and a catalyst for curing. Once the coating is applied, it hardens within minutes into a thick, durable surface that’s also resistant to scratches, staining, and chemicals. Polyurea coatings are great for areas such as bathrooms, kitchens, entryways, basements and pool decks where an attractive finish is desired in addition to durability.By choosing the right coating for your project, you can ensure that your concrete surfaces look great and last a long time.

We hope that our instructions have provided you with enough information to successfully complete your own concrete coating project!  If you require any assistance in installing Polyurea & Polyaspartic Flake Floors in the Chicago area, contact us today to get started!